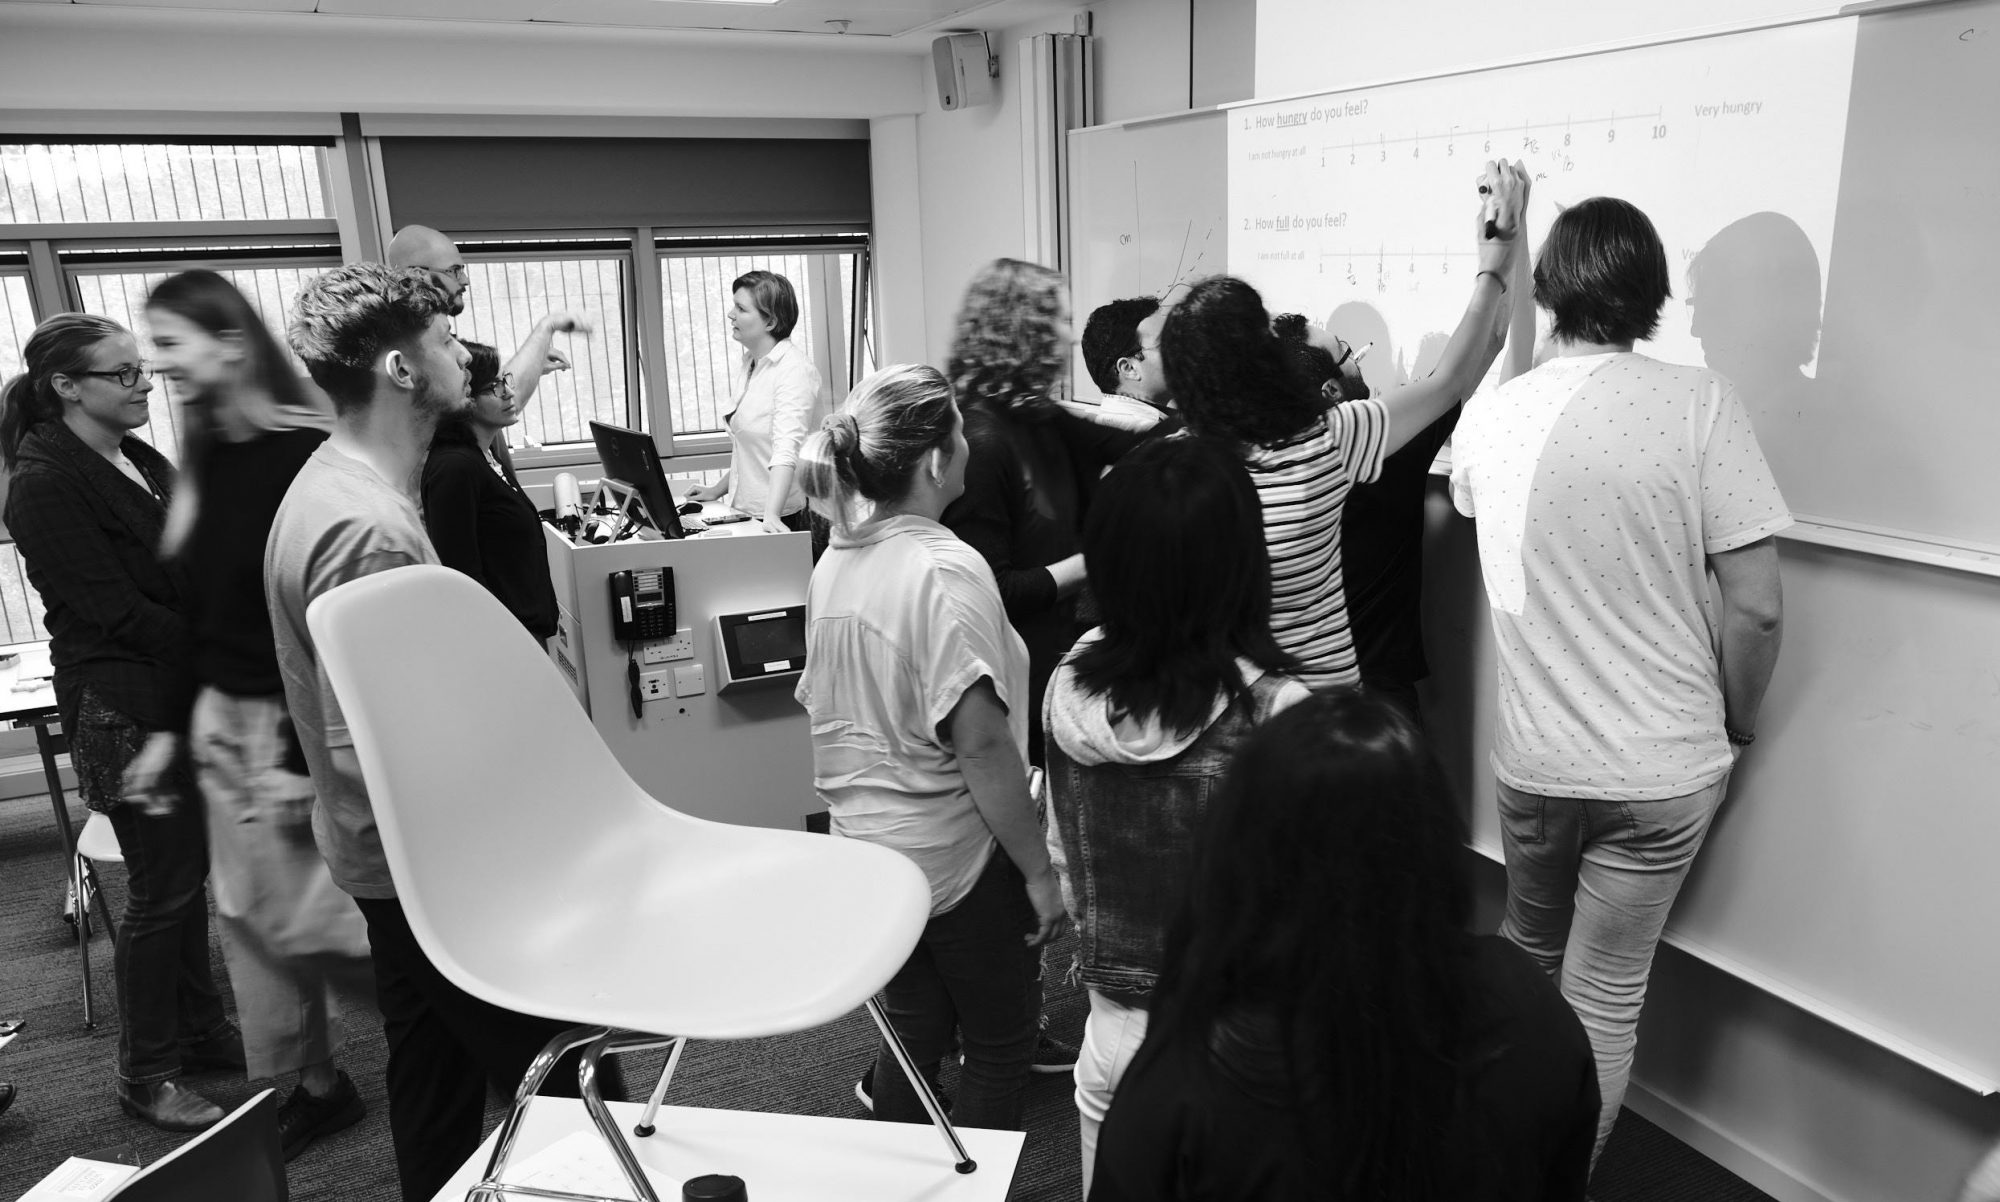
A big part of SCIENTIFIC exploration – experiments – is the data they generate. We are really keen to understand how you FEEL as you build a strength practice – and so looking at your own experience as a scientist is a Big Deal – THANK YOU for this contribution. We have some strategies to help you with that reflection – you may never use these measures during your workouts again after this study, but while you’re running this pilot, these are part of your lab, your experimental apparatus
There are a few assessments you can use both as a baseline at the start of the pilot, and then at the end to monitor overall changes.
There are a few assessments you can use within your sessions to monitor how you’re feeling/doing on any given day and day after.
In this pilot program, we’re all scientists – exploring the question of what is the experience of building strength and a strength practice. Our key question is: how do you feel how you feel? how do you perceive your experience so that you can build lasting useful knowledge, skills and practice of strength.
So we’re asking you in this pilot not just to try out a strength program, but to value your own attention, your experience. We have a few guides to help you reflect on your experience. We have a few for start and end of the study, for daily reflection and for inside the sets themselves. Science is data capture!! Below we review these assessments that you’ll SOON (april 20th i’m writing this) be able to record in the app itself.
Assessments
The Baselines are Wall Sit and Plank – and Heart Rate is also useful here (explained below)
The Daily review includes how you feel, relative to the day before (same better much better worse much worse) as well as general “freshness” – great to do when waking up – very simple question: do you feel rested? did you wake without an alarm
The Within Set measures include Heart Rate, Visual Acuity and Rate of Perceived Exertion.
Baselines
The Wall Sit
At some point before week 2 when we start in earnest, do a wall sit test, and record your position and time:

The wall sit test is a classic for assessing your current leg strength.
Imagine you’re sitting in a chair, but there’s no chair: you press your back against a wall and get down to ankles under knees, and upper legs parallel to the floor – like sitting in a chair.
60 seconds MAX
this is an assessment not a workout
You do not move; you see how many seconds you can hold that position.
You put effort into it.
If you cannot get down to the full thighs parallel to the floor – that is COMPLETELY FINE – Note where you can get to – and don’t worry about holding for time. Just note how close to that parallel thigh position you can get.
If you do get down to the parallel position, great! then start holding (you may wish to have some kind of external instrument to reality check your times – i find that i count faster than a second rate when doing these sorts of assessments.
The goal here is simply to baseline where you’re at today, and then assess after the mid point and again at the end.
Of course you can check every week, but we’ll check at these three points.
The Plank
Ah the plank

the version shown here is also known as the “hard style” plank which has been shown to generate the most muscle activation of variants in this position.
the plank another classic assessment of an ISOMETRIC – (we’ll talk about those) where time is the big variable for testing a particular strength capacity
The plank is a tried and true way to give us a view on literally being able to keep it together – and is a similar form to its more dynamic cousin of the push up – which we’ll try out in various forms anon.
Let’s look at the form we need to achieve for the assessment.
You’ll note that the back and butt are if anything flat to seemingly up a bit, but NOT SLUMPED DOWN.
if you see photos of folks with their butts lower than their shoulders, their backs looking swayed – it’s just not this – it’s something but it’s not a hardstyle plank.
You’ll also note ELBOWS UNDER SHOULDERS.
hands are in FISTS facing each other
HEAD is neutral – face pretty much facing the floor –
— it’s really easy for the head to drop or to crane it back – STAY NEUTRAL SPINE as it’s called – a PLANK
Here your target is 60 seconds
eventually we’ll try out a two minute test but not today.
Also – if you feel like your back is dropping? squeeze! squeeze everything and anything – shoulders, butt, legs feet hands – to keep that hold as long as you can – till 60 secs. MAX
just note: how close did you get to 60secs? there’s NO NEED to go over 60. This is JUST an assessment – not a feat of endurance, ok?
IF THIS FORM IS OUT OF RANGE FOR YOU TODAY:
For this assessment – like the wall sit: if the whole position is not possible to hold right now, that is GREAT INFORMATION!! make a note of how much of the position you could get into – and where the challenges are.
That’s all – we’ll notice progress as we get going.
POMS – Profile of Mood States
this is the one mentioned in the video chat
Part of week one, see what you learn from this assessment. Please keep a note of your score. Here’s a link
Daily Assessments
Heart Rate – pre and post your session – Radial Pulse
A great way to assess your state – and how variable it is – is to check your pulse – before your strength session, during and for sure right after, and then two minutes after (known as the recovery interval).
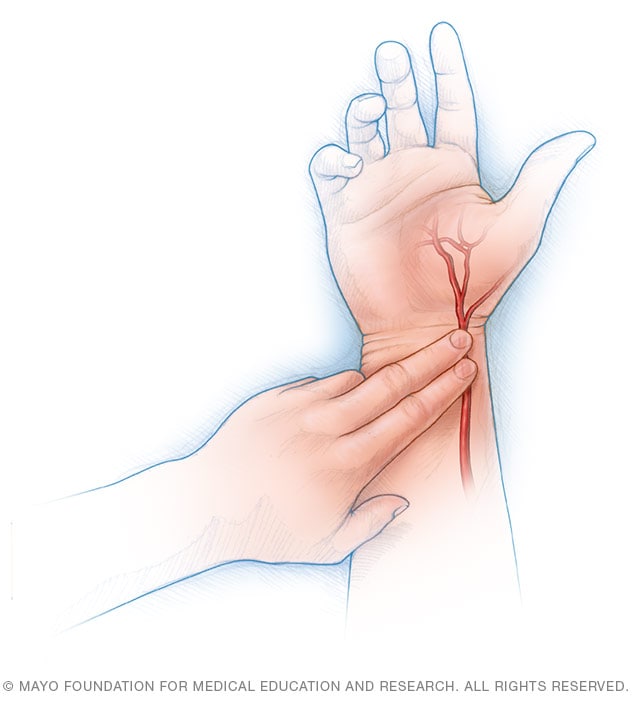
you could use your phone’s camera and light BUT
Part of the exploration in this study is to get better at building your own awareness of our own fabulous sensors/signals.
So in week one – explore finding your pulse. Radial pulse is great – that’s your radial artery that comes up from the heart, going away from the brachial plexus up at your cervical spine (up your neck and down your arm). How to One How to TWO
There’s other places of big arteries like the carotid artery in your neck – you can get a pulse rate but this one has a bit of a skill level to it
Within Sessions
Heart Rate – again
Within sessions, you’ll be asked to check your pulse before you start your blocks and then at the end of your complete session.
Visual Acuity

If you have about 3Meters of space where you’re working and can hang up an eye chart, it’s great to check your visual acuity between sets and/or between Blocks.
Link for FREE A4 printable 3M chart (pdf download)
– if it’s where you’re working out so much the better. Why do this?
Vision is affected by our state. You may find that when you’re working at a higher intensity your distance vision gets clearer – there are reasons for this (there’s a talk about this in the we’re working out Video channel collection here on livestream…i’ll find it)
What’s cool is when you work harder, this is when the clarity kicks in
when trying something a bit new/weird, you may find that you don’t get quite as far in that harder to read line.
note: bright light also improves distance vision, so if you set up your lab outside from time to time, you may find that your clarity with the chart also improves.
What to record
In any case, you may wish to record the line you get to on the chart (with or without glasses – however you typically work out) – at the start of the workout, between sets, and end of workout
Rate of Perceived Exertion – RPE
RPE is the most commonly used self-report assessment of effort in sports science.
It’s a ten point scale – you’re aiming to get your blocks to be at about a 5-6 level – 7 once in a while. Here are some heuristics for assessing what these levels might feel like:
do you feel between 4-6 during your Blocks?
RPE
WHAT IT MEANS
0-1
No exertion. The only movement you’re getting is pushing buttons on the TV remote.
2-3
Light exertion. This is how you should feel when you’re warming up, cooling down, and stretching.
4-5
Medium exertion. You’re breathing a little faster. Your heart is pumping a little faster. You’re feeling a little warmer, but you could still hold a conversation.
6-7
Moderate exertion. You’re breathing pretty hard now, you’re probably sweating. You can talk, but it’s getting tougher — you prefer to give one- to two-word answers, or when you’re solidly at a seven, no talking at all.
8-9
Hard exertion. You’re breathing really hard and you and you really don’t want to talk at all. You’re wondering how long you can go on like this, but you could go a little faster if needed.
10
Hardest exertion. You can not keep this pace for more than a minute. Speaking is impossible. This is your limit. This is a sprint.
Here are a few links if you’d like to dig into this: more overview and even more overview/context (pdf)
All this Data seems Bigger and More than it Is
If all these assessments feel like A LOT – once you get your lab and rhythm set up, there’s an easy flow:
Also – please believe: taking these measures is for a STUDY – when you get off on your own practice – you can do these measures or not – but here’s one thing you’ll be able to test: you’ll start to FEEL what your heart rate likely is within 5 (at most 10) beats. You’ll have a stronger sense of when your heart is back to normal too. In other words this deliberate practice now will PAY OFF big time after this pilot is over.
So be data-geeks with us during this study, and just be strong strong for the rest of your life, anyway you like after this study 🙂
Related Links
https://livinglab.soton.ac.uk/xb-strength-moves/